
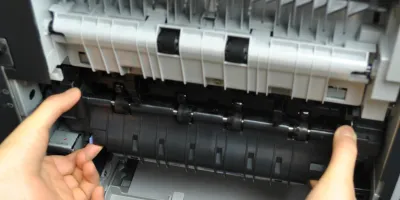
<p>Easy to follow installation guide for RM1-1082 fuser, used in <a href="https://secure.partsmart-corp.com/kit-and-fuser-assembly/hp-laserjet-f2… maintenance kit</a>. F2G76-67901 maintenance kit is specifically designed for HP LaserJet Enterprise M604, M605, M606 printers.</p>
Compatible models
Detailed Step by Step Instruction
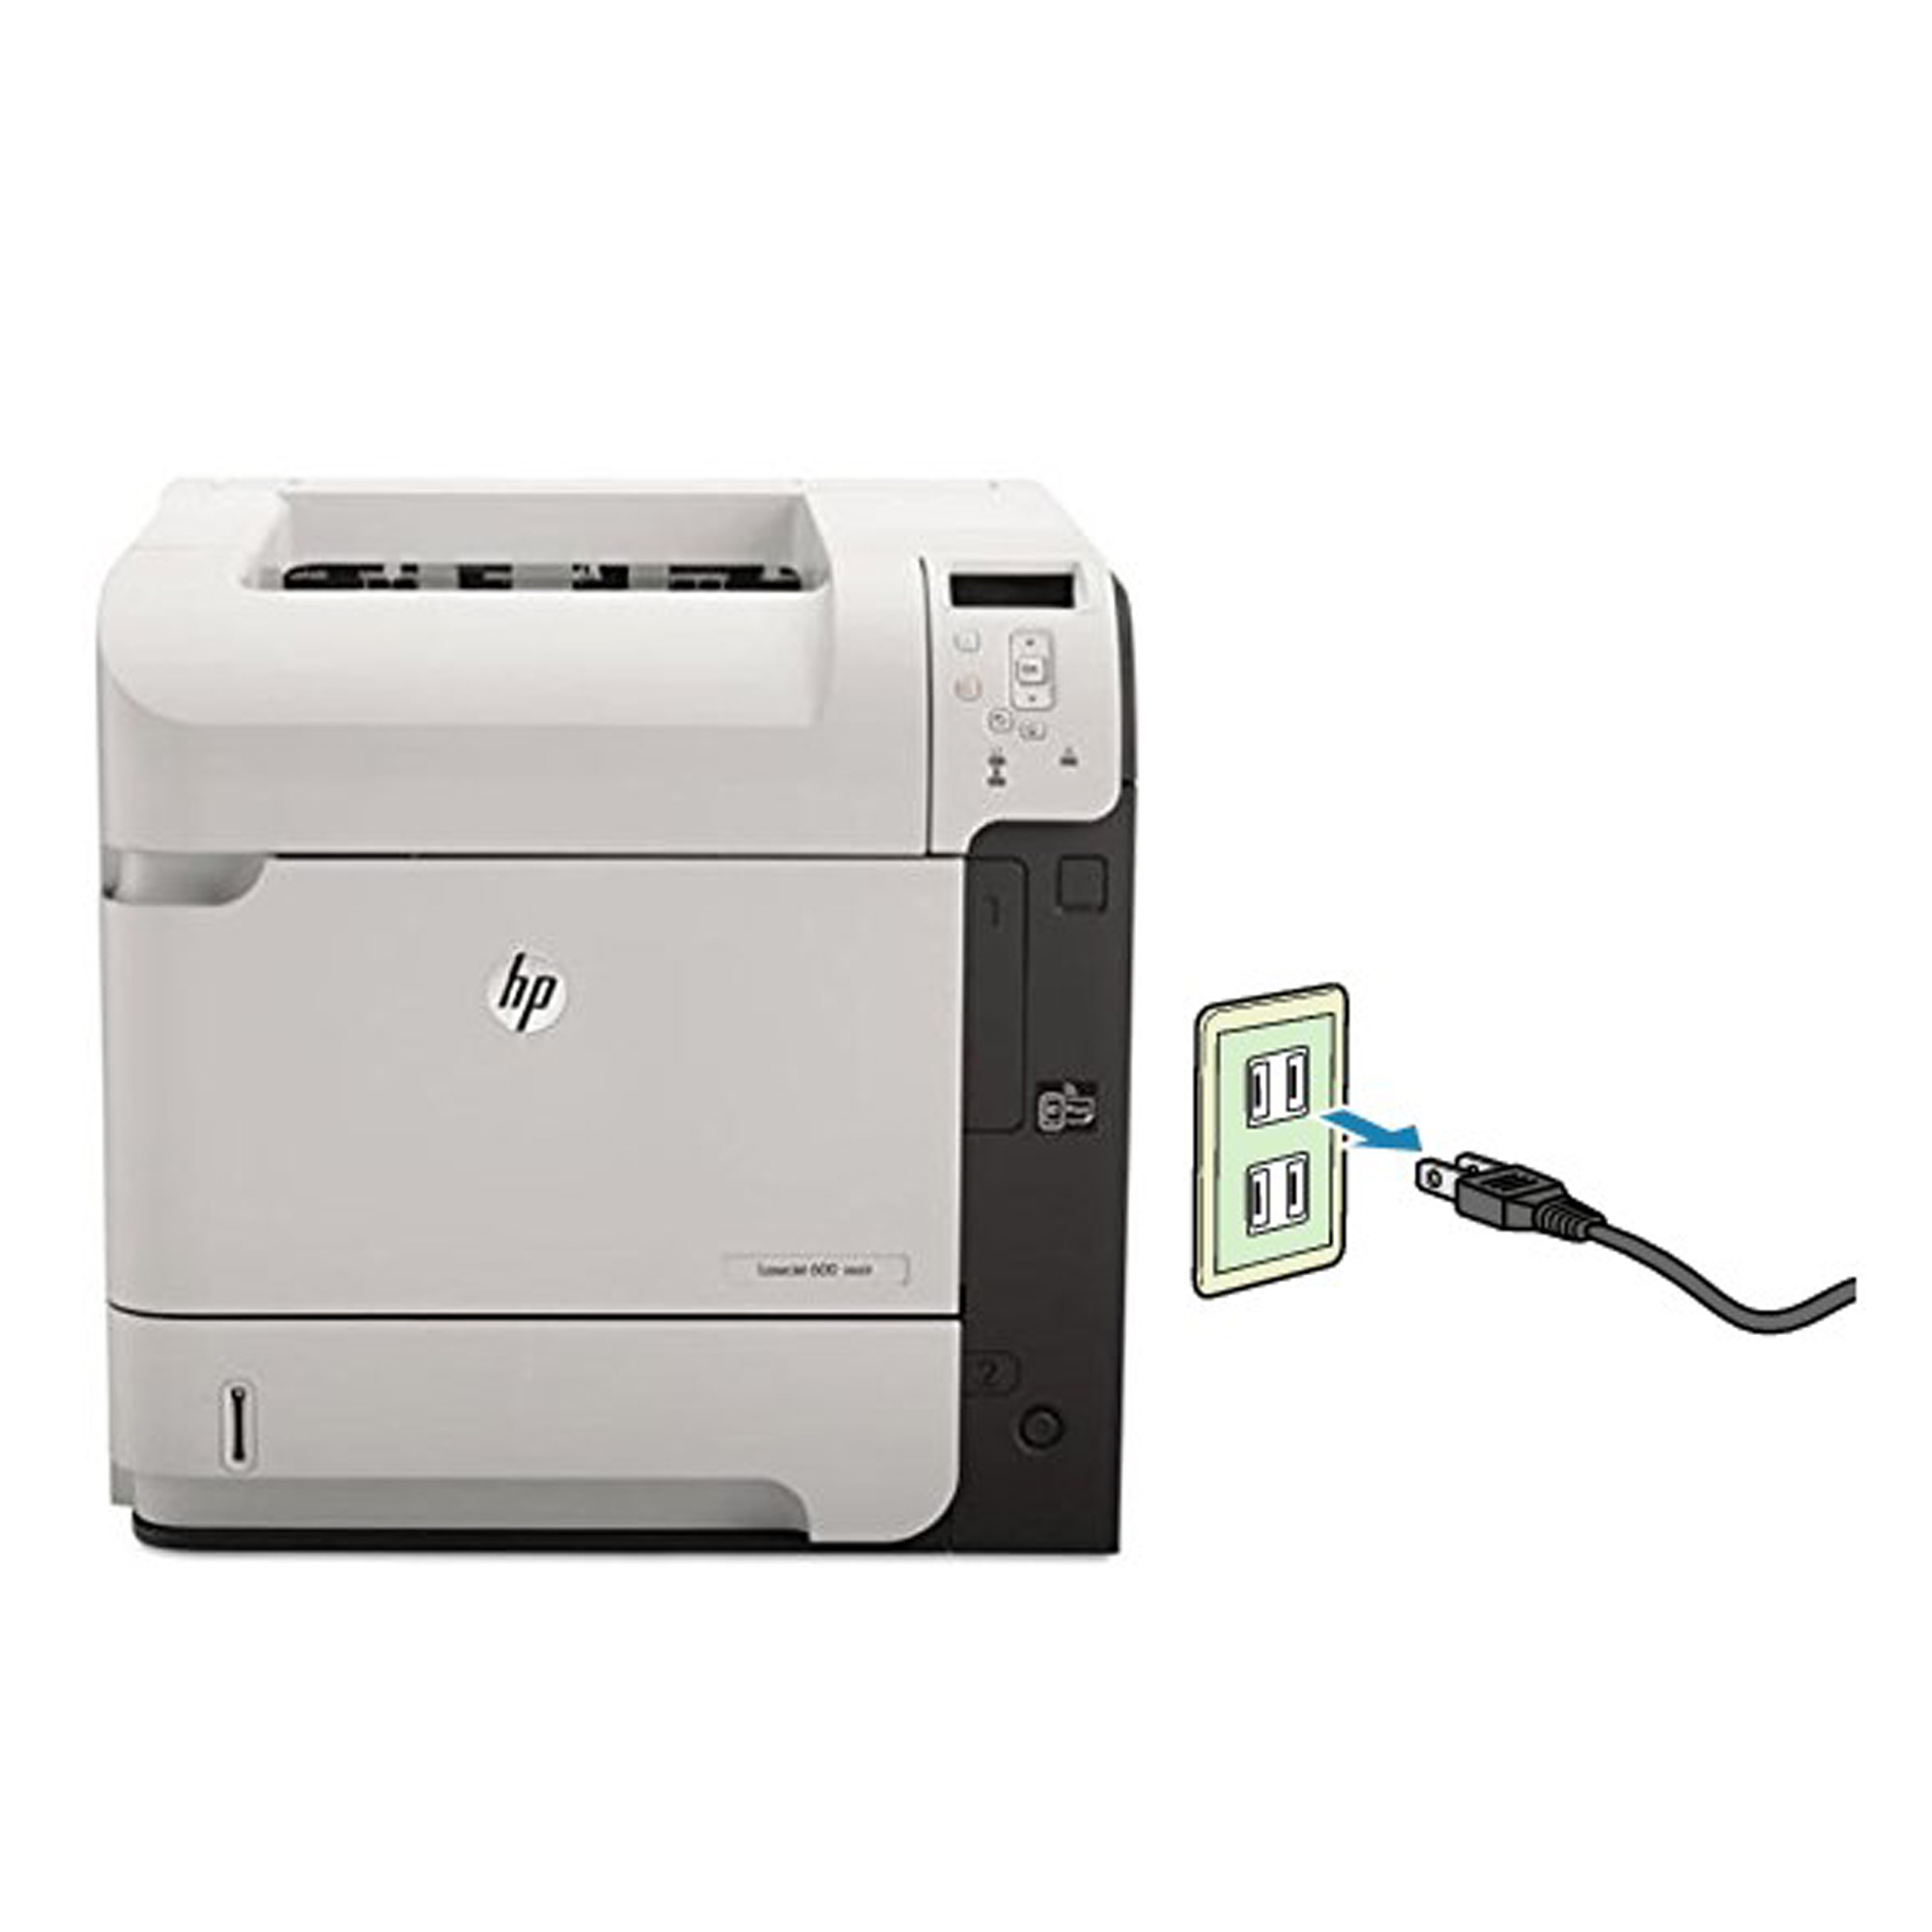
Before installing the fuser, turn the printer off and unplug the power cord (wait 30 minutes until the fuser cool down before proceeding).
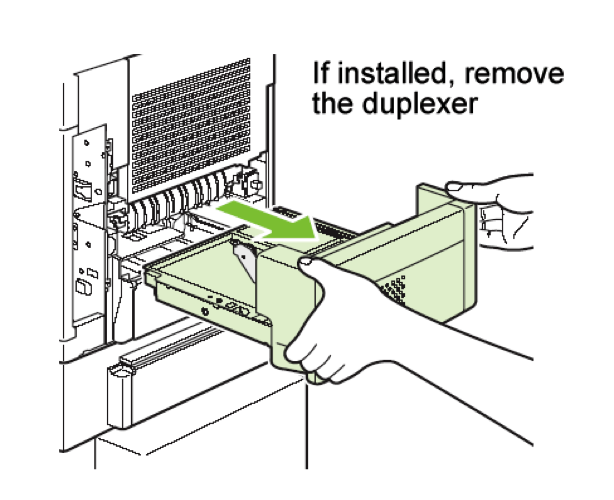
Remove duplexer from the back of the printer.
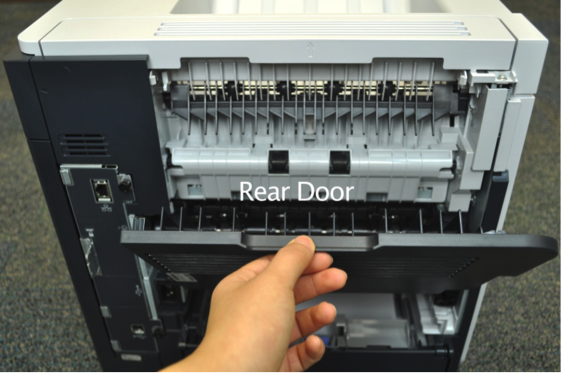
Fold down the rear door.
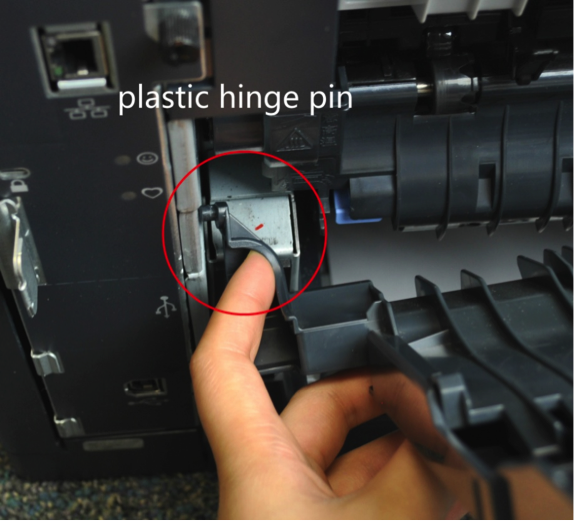
Flex the plastic hinge pin on the bottom left of the rear door and squeeze the left hinge pin to release the holding tab.
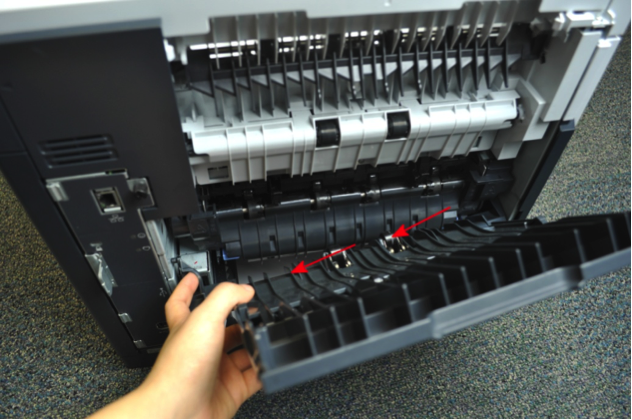
Slide the rear door to the left to remove from printer.
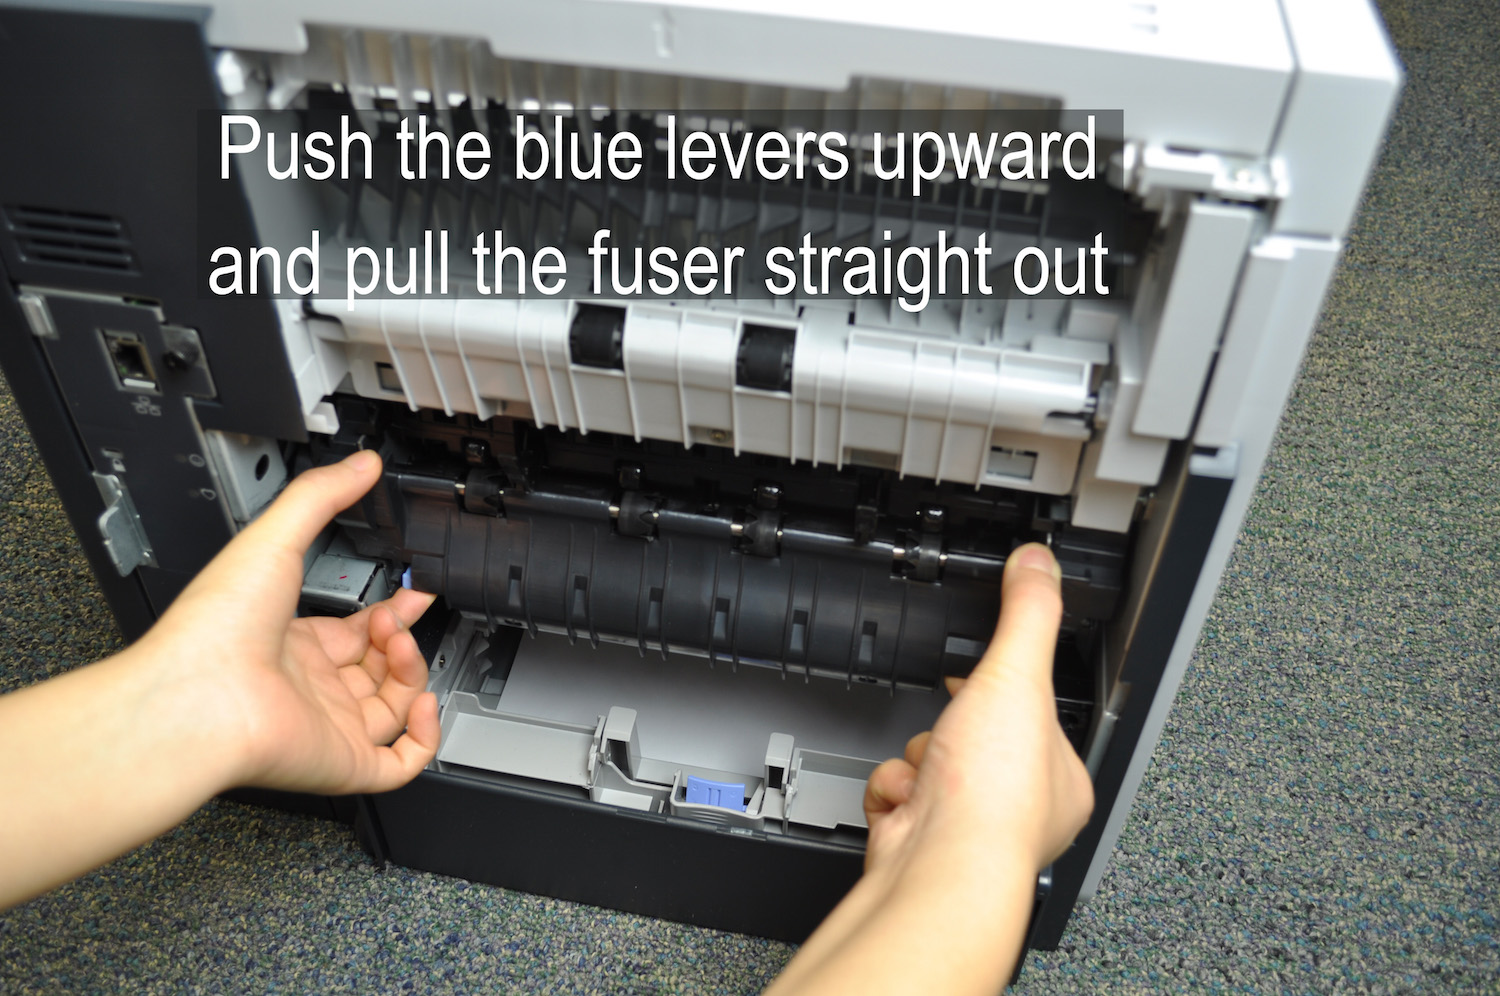
While holding onto both sides of the fuser, push the two blue levers on the bottom of the fuser and pull the fuser out.
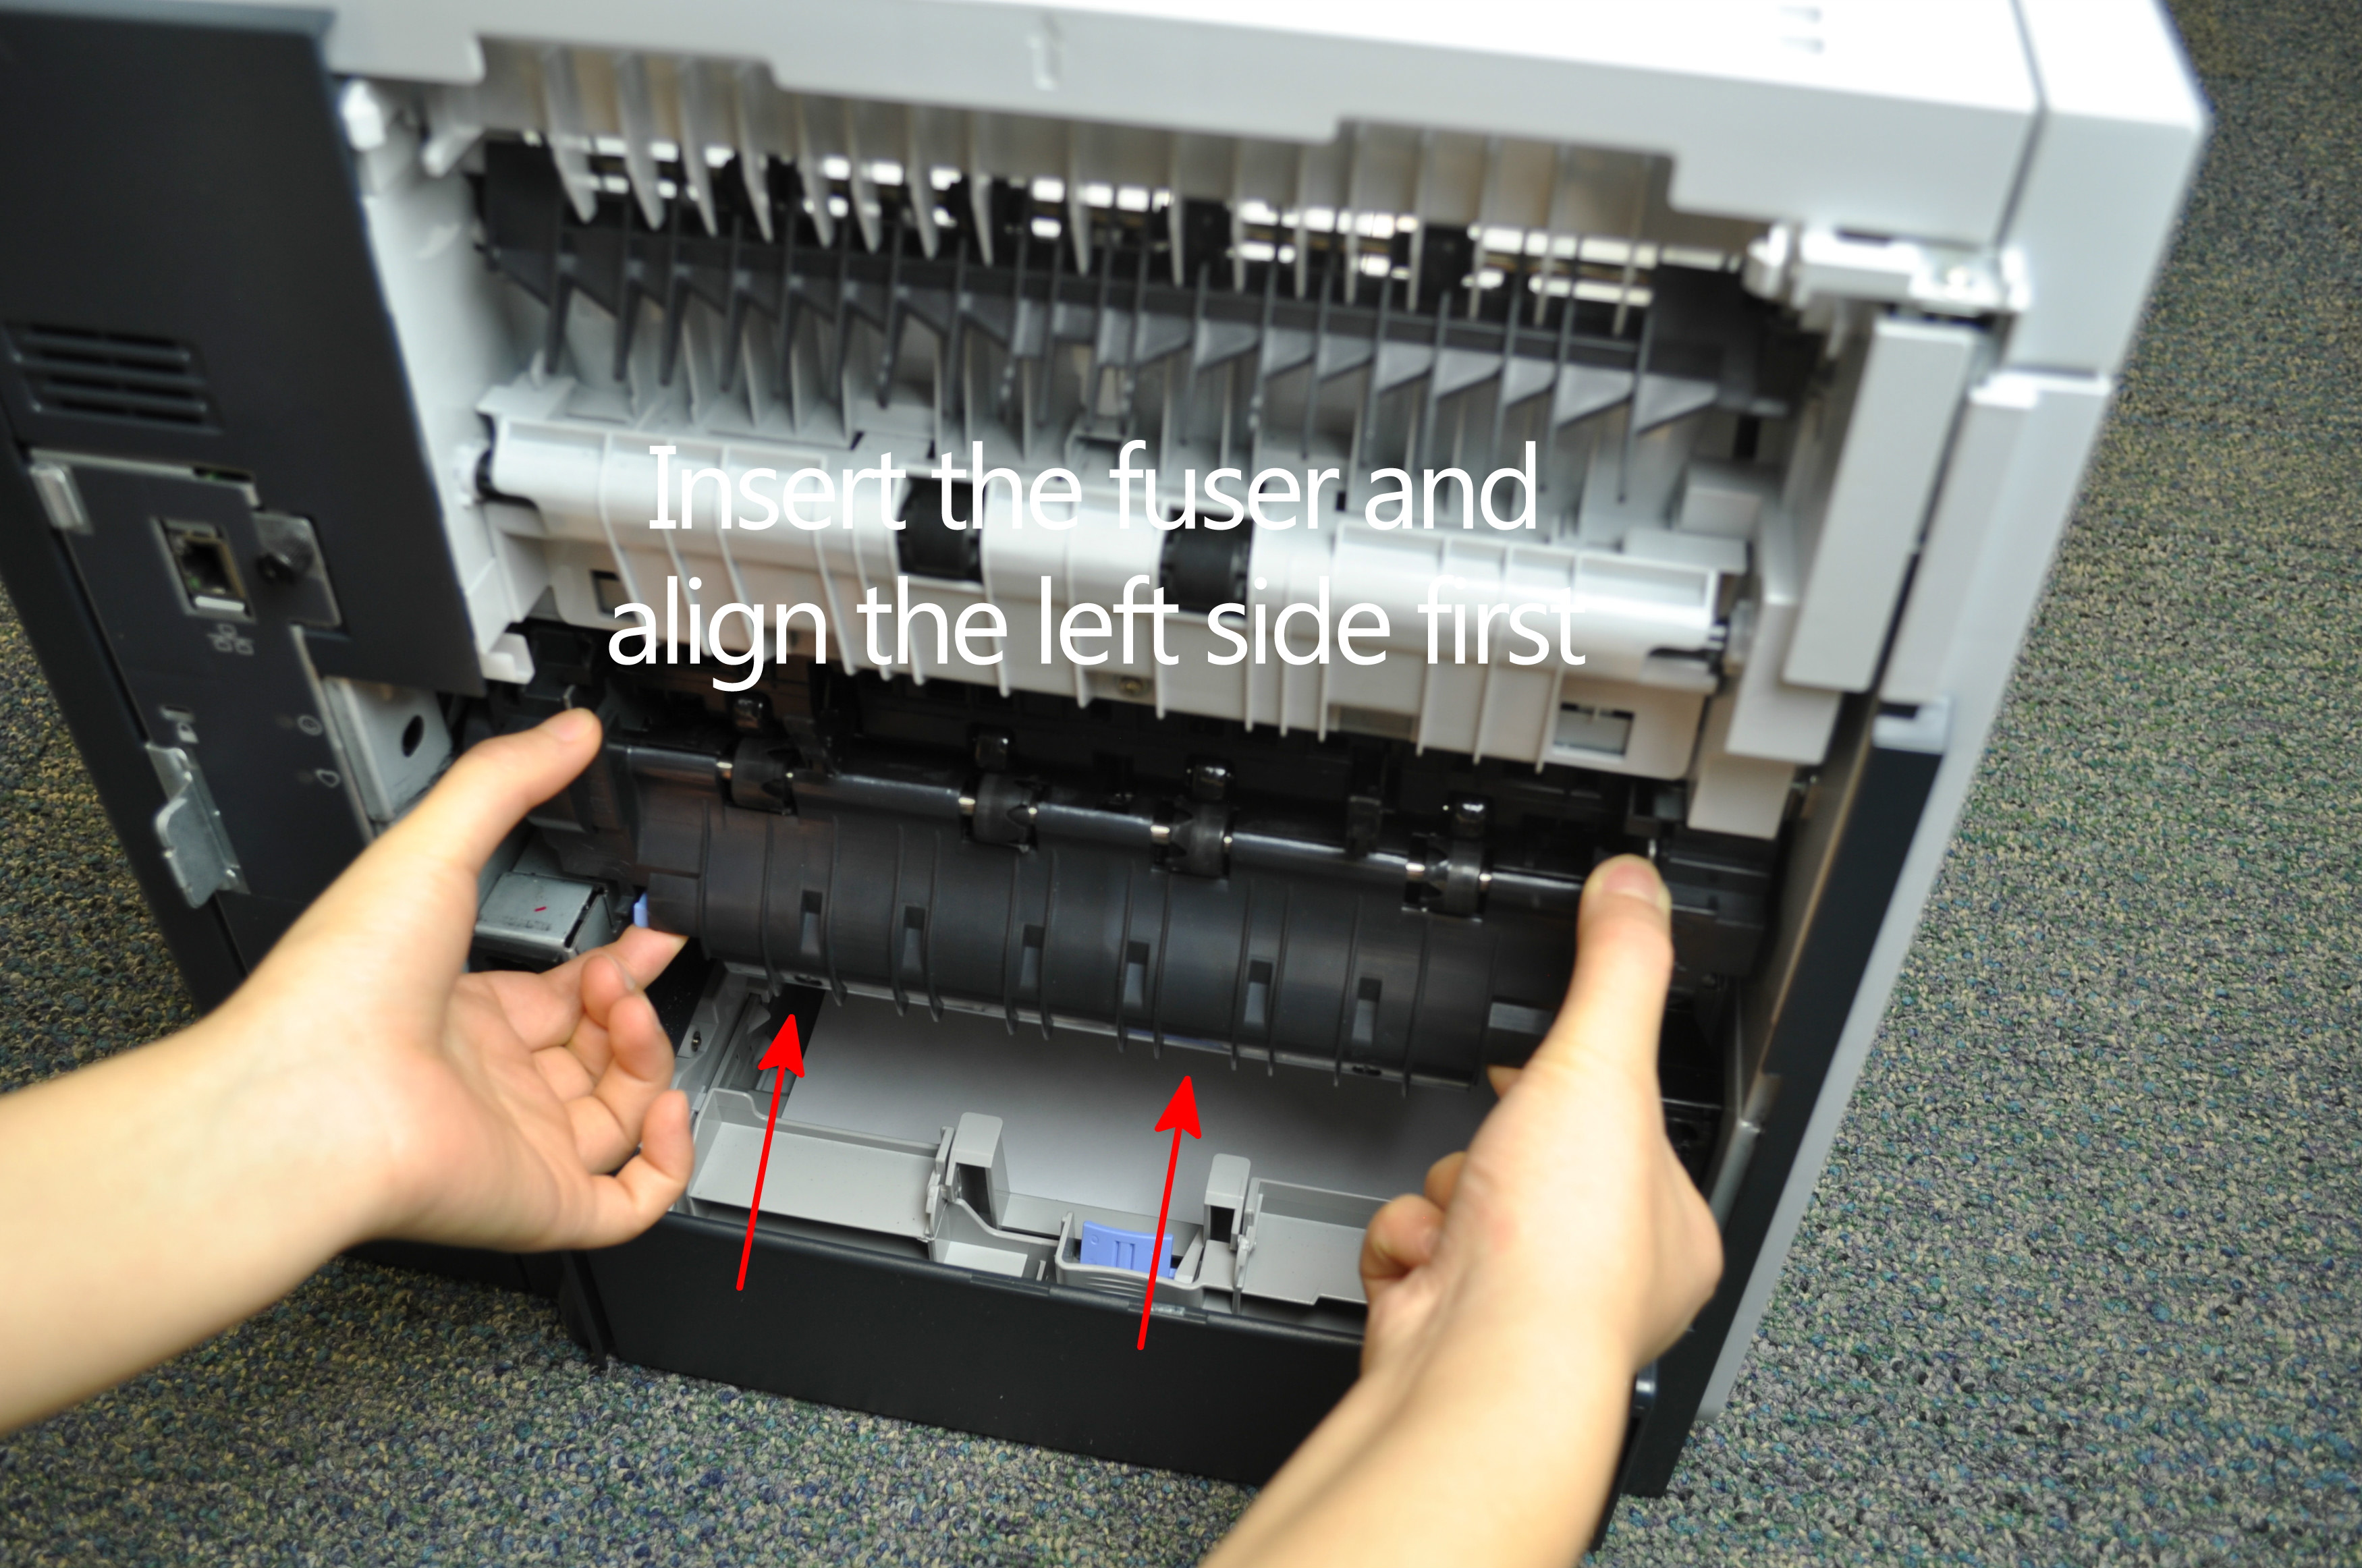
Install the replacement fuser by inserting it and aligning the left side first, making sure that the fuser is fully seated into the printer and you will hear a sound of both blue levers snap into place.
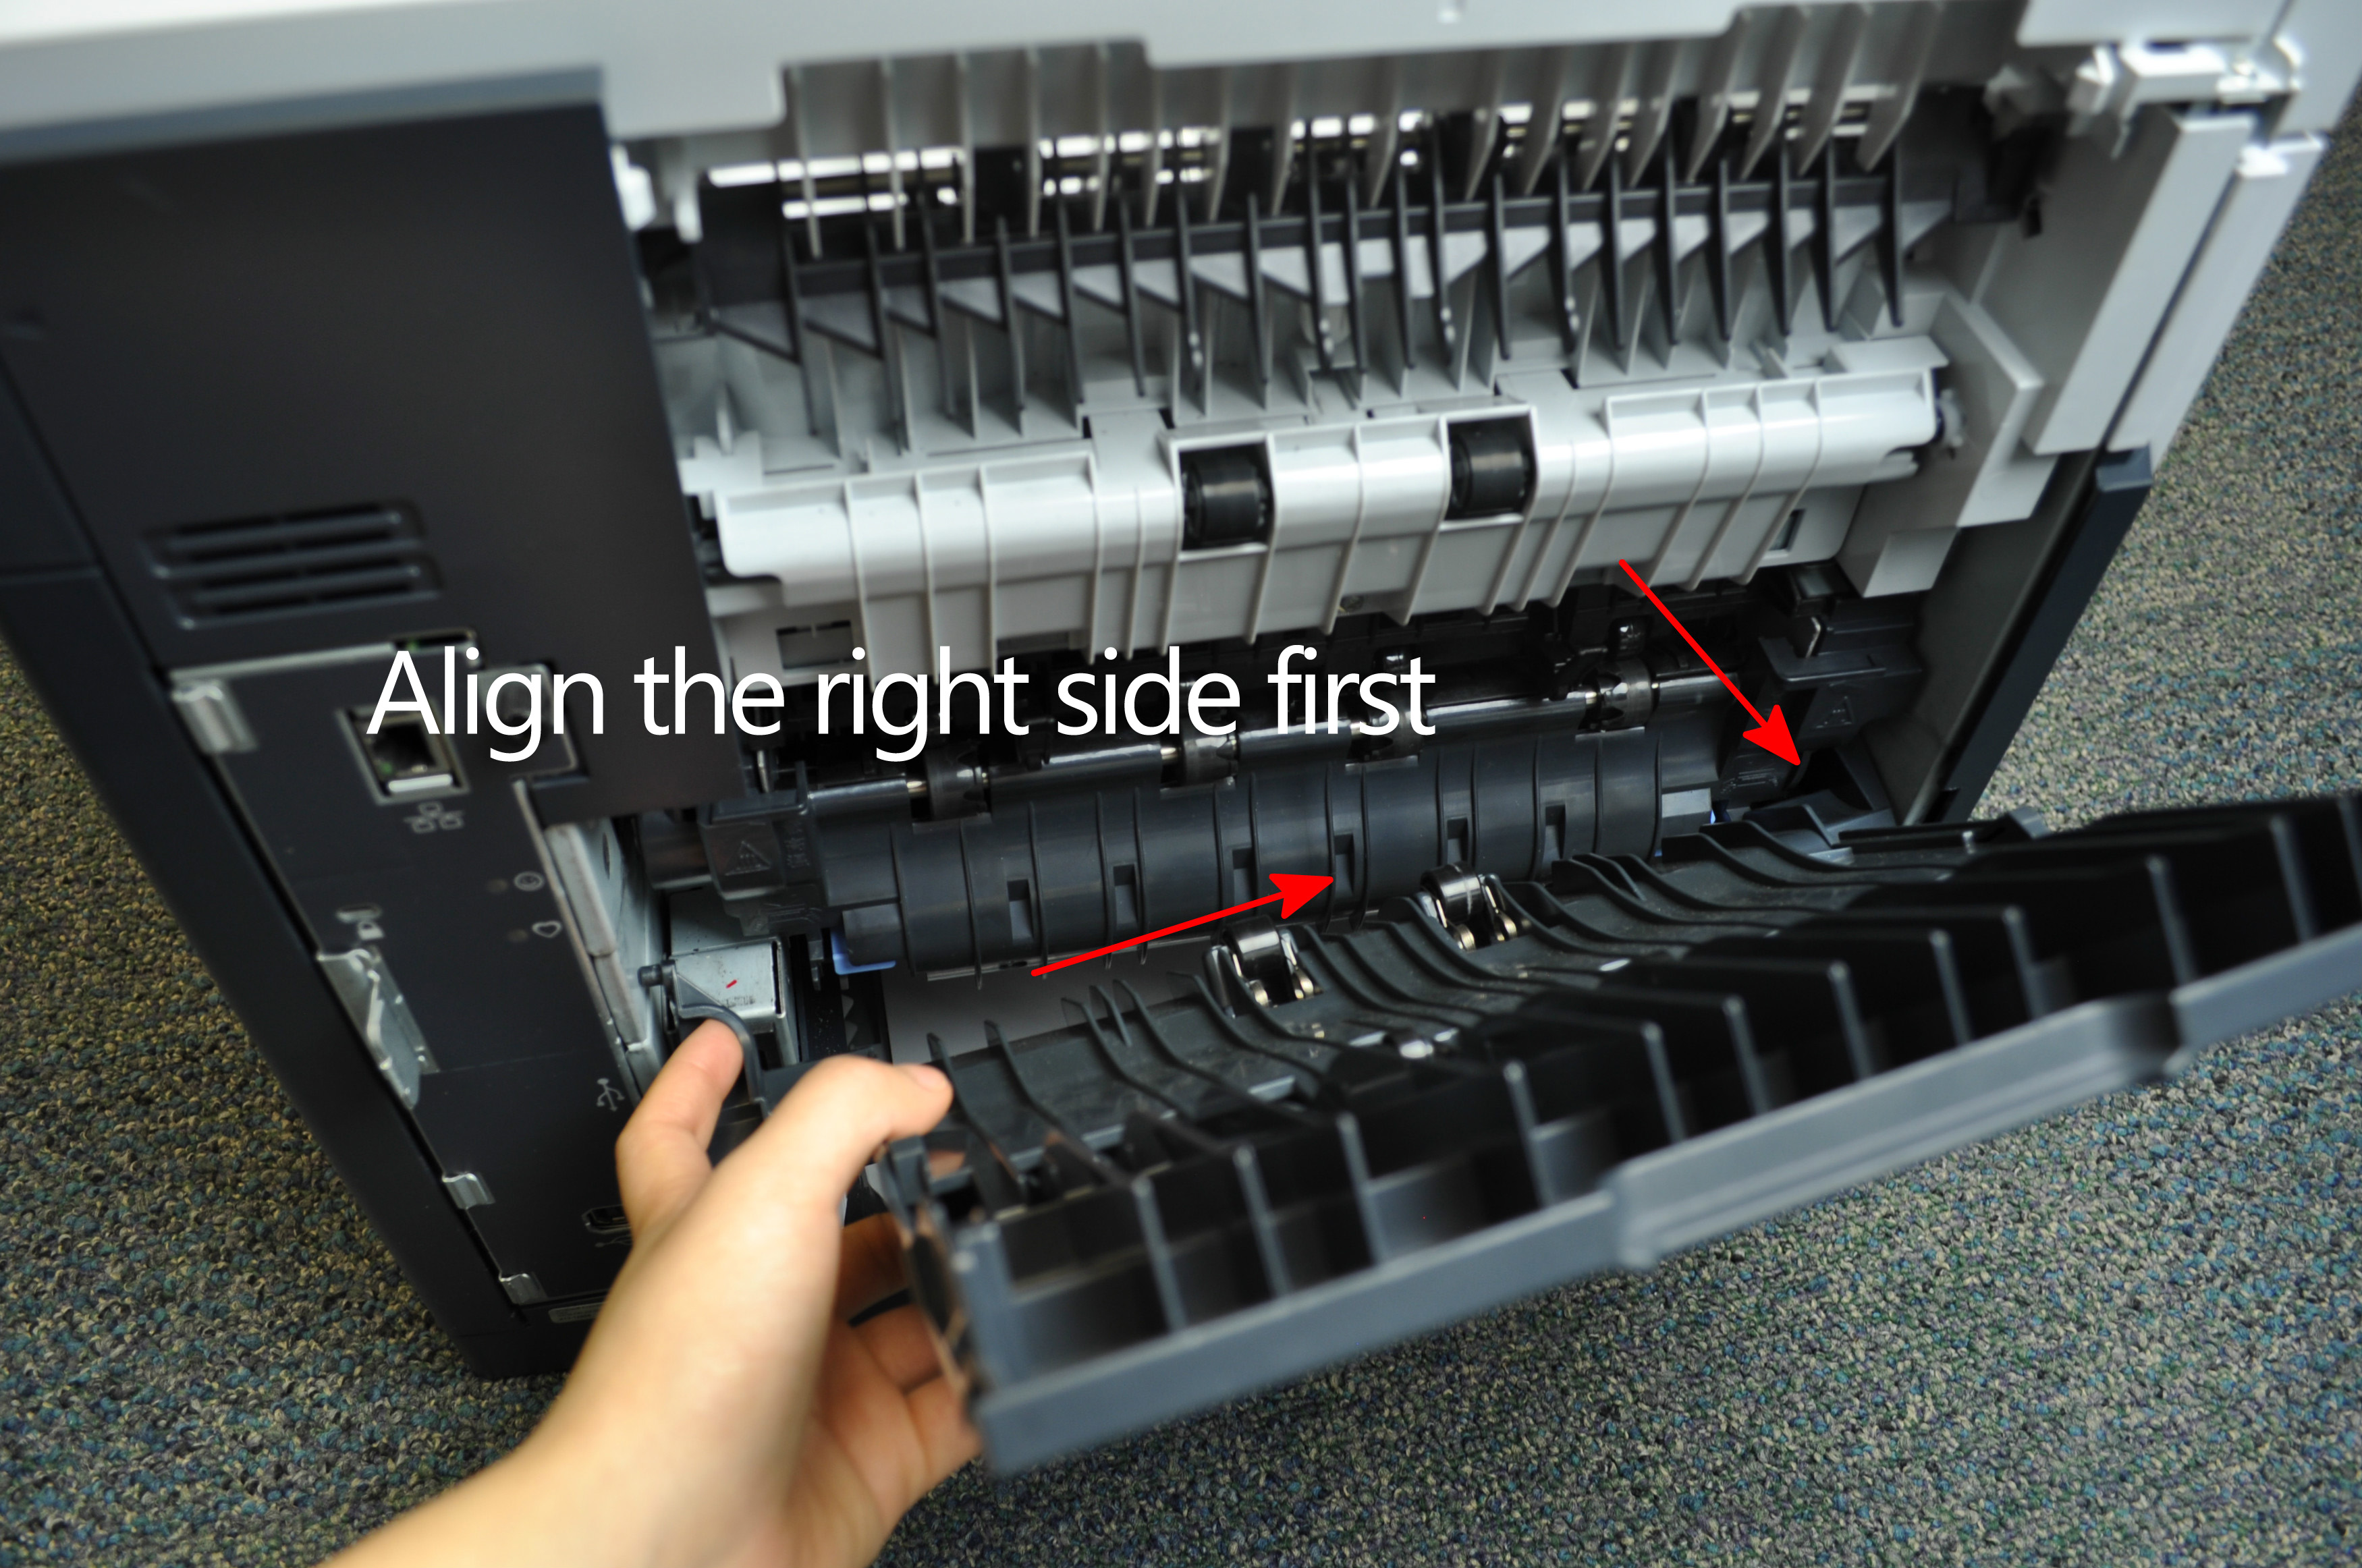
Reinstall the plastic rear output bin.